Stuffed Silly! A DIY Stuffed Animal Backpack

Whether I’m in an amusement park, at the mall, or on a jog through the park with my dog, I constantly find myself running into people with stuffed animal backpacks. I don’t know what it is about these backpacks, but I’ve always found them to be absolutely adorable! When I was younger, I myself had an Eeyore and Pooh bear stuffed animal backpack and I would carry them around with me all the time. Now that I’m older, I thought it might be fun to make a backpack out of a random stuffed animal.

I’ve never done this before, but I ran into this GREAT guide on epbot.com (which I’ll share with you all below that will definitely guide e through the process. If any of you have a DIY itch, this should fulfill your mini-project yearning.

First things first, if you want to do this project, you’ll need to pick a stuffed animal. A monkey is a great choice because they have long arms and legs, so you’ll need less string to attach, meaning a more fun, happy, and cute looking backpack.

Start by opening their back and yanking out most of the stuffing.

IMG_9484

IMG_9489

Next, you’ll want to create the bag that goes inside your stuffed animal’s back. Try and look for some fabric that mostly matches the color of your plushie.

Place a plate inside the open back to determine how much room you have, then use that plate as a template to draw two circles on the fabric. You’ll also want to cut out a long rectangle of the fabric, like so:

IMG_9490

Now to put that fabric together to create a pouch. Create a cylindrical shape and pin and sew the circular pieces of fabric to the “top” and “bottom” of the cylinder, making sure to leave a slit, like this:

IMG_9493

IMG_9498

Side view of pouch.

You want the “good side” of the fabric to be on the inside, and you’ll finish off by adding a zipper to the slit (plastic, not metal).

IMG_9499

Now, stuff your pouch into the stuffed animal’s back and hand-stitch around the zippers edges. To create the straps for the backpack, you’ll need to somehow attach the plushie’s hands and feet. Find a strap that you can cut into 4 sections (also a matching color, or black as an alternative) and attach D rings to two of the ends. Open up your plushie’s paw just a bit. . .

IMG_9507

. . . And place in the end of the strap that doesn’t have the D ring. If you’re placing in a strap that doesn’t have D rings at all, either end will work. MAKE SURE that the straps with the D rings are on the hands, not the feet, as this will make it easiert to adjust the straps. Hand sew everything shut to finish. . .

IMG_9512

monkey (1)

. . . And you’ve got yourself a stuffed animal backpack!

IMG_9529

Toilet Tank Replacement: For One-Piece Toilets

When you buy a two-piece toilet for your home, you probably look for good features such as water efficiency (gallons per flush), noise level during flush, and shape (round vs. elongated). You probably pay attention to these details because two-piece toilets come in a bundle, a pre-determined bowl and tank matching your description. While this is fine if you’re not looking for anything in particular, there are some folks who like to buy their toilet bowl and tank separately.

You can buy your bowl and tank separately for more reasons than particularity, though. Sometimes, when ordering your two-piece you may come to find that your toilet tank got banged up during the shipping process, causing some chips or cracks in the porcelain. The nice thing about two-pieces is that you can easily replace only the damaged part, in this case the tank, instead of having to replace the entire toilet. When looking for features for a toilet tank, the flapper is probably the only thing you’ll really be able to customize. Below are the three basic flappers, each offering their own unique characteristics:

  • Rubber Flapper – Rubber is the material that’s most often used in these flappers because it’s the least likely to fail. Rubber provides a tight, waterproof seal and does not conduct electricity in the event something was to fall into your tank full of water. Rubber is also fairly inexpensive to mass produce, and with a simple design, can be produced quickly and efficiently.
  • Seat Disk Flapper – This type of flapper is the oldest type used, but this means bulk. Unfortunately, bulky pieces like this aren’t ideal because they’re difficult to repair and take up a lot of unnecessary space in the toilet tank. The cap is sensitive and can easily be damaged, so consider all this before purchasing. If you are interested in seat disk flappers, there are two kinds to choose from, threaded and snap-on.
  • Tank Ball Flapper – You’ve probably seen this sort of flapper before. This is essentially a buoyant rubber ball that sits on top of the water in your tank. This type of flapper is exceptionally reliable, but you’ve got to watch out for chain length, as this is the most critical aspect of this flapper and having the wrong length can result in problems such as a faulty seal or excess waste of water.

Besides this internal features, if you want to further customize your tank you may do so by choosing its aesthetic properties. That is, do you want it to look contemporary, or vintage? Are you happy with the standard look, or do you want something that stands out in terms of basic design? What color are you leaning towards? There are many different possibilities to look for in your toilet tank, so make sure you choose the one you love that fits within your budget! For one of the biggest and best toilet tank selections online, visit Plumber’s Stock to browse through their virtual warehouse of name brands, all from the comfort of your home.

American-Standard-Cadet-White-Pressure-Assist-Toilet-Tank-with-Right-Hand-Lever

            Till next time!

Casey

Air Purifiers

In a world where smog, pollution, and haze dominate our cities and towns, air pollution has become an area for big concern. I grew up in Salt Lake, one of the most polluted cities in the US. Even now, the mountains surrounding the Salt Lake valley create a sort of dome which prevents much of the pollution from dissipating with the morning sun. As of 2013, this puts Salt Lake at number 6 in short-term particle pollution (according to stateoftheair.com). But if that’s bad, it’s even worse during the winter. According to the New York times, “. . . the area has been grappling with one of the nation’s most vexing pollution problems, where atmospheric inversions during the winter months lead to a thick fog of dirty air cloaking the region.” Growing there as a child, this is something I fully believe. I even remember having friends in Jr. High (middle school) whose mom wouldn’t let them out on windy and stormy days due to the pollution. Out of the 5 siblings in her family, 3 of them suffered from mild to severe asthma. Air pollution is no laughing matter, and it’s definitely not something to be taken lightly. If you have kids with asthma or other respiratory problems that are triggered by pollution, you know exactly what I’m talking about. Masks can be helpful in stifling the air outside, but what about the air inside your very own home? Unfortunately, dirty air isn’t held back by 4 walls and a roof. It seeps in when the windows or doors are open, and it can cause some nasty respiratory flare ups in your home’s inhabitants if left uncontrolled. Because of this, it’s recommended you have an air purifier in your home, especially if you live in a heavily polluted city. Aside from the important asthma benefits air purifiers produce, they can have other benefits within your home:

  • Allergy Relief – I’m the kind of person who gets allergies come every spring, and an air purifier can help with even this. A big reason allergies exist is because of how dirty and saturated our air is. If you have an air purifier, you’re essentially using powerful filters to suck in the air and clean it, so even the most sensitive among us can have an easier time breathing.
  • Fresh smelling air – You probably don’t notice it, but pollutants tend to have very distinctive scents. An air purifier will filter out those pollutants and odors to leave your home with a fresh, wonderfully clean scent.
  • Overall Health Benefits – The best air purifiers do more than just help you breathe better. A high-quality air purifier will produce many overall health benefits that come from long-term use. This includes lowering sickness rates (many diseases, such as the common cold or flu, can be transferred person-to-person through the air), retaining more skin moisture (dry, itchy, and flaky skin can be produced by dry and dirty air), and even helping stifle allergies caused by animal dander.


If you have loved ones in your home that suffer from respiratory problems, whether it be asthma or bronchitis, investing in an air purifier is one of the greatest acts of love you can show them. If you’re interested in learning more about air purifiers, or if you want to check pricing, visit Plumber’s Stock by clicking here.

Water Softeners – What’s the Big Deal?

            You’ve probably been in a situation where the water was too hard or soft. For myself, I’ve taken showers in places where the water feels almost like small bullets ricocheting off my back and I’ve drank water from restaurants that made me feel strangely vacant and empty inside because of how soft it was. Good water, whether for drinking or showering, is somewhere between the two extremes but can be difficult to achieve without a proper water softener system.

            WHAT IS IT?

            A water softening system is a system used to combat hard water (that is, water filled excessively with minerals and ions) by removing ions such as calcium, magnesium, and other minerals from your water supply before it reaches you. It may not sound like a big deal, but hard water creates a risk for limescale deposits, which can lead to some pretty nasty buildup over time by causing problems in your pipes and lowering the efficiency of your overall plumbing system.

            In addition to creating potential problems for your pipes, hard water can also damage your daily life by creating dry, itchy skin, faded clothing, opaque spots on your dishes , water spots on faucets, rings in your tub or spots on the shower floor, and in extreme cases, appliance failure.

            TYPES

Image

A typical water softener system for your home.


            There are four types of water softener systems that are commonly used in homes: Ion exchange, salt-free, reverse osmosis, and magnetic. Before purchasing any of these systems, it’s a good idea to do some research and figure out what kind of system would be best for your home, needs, and budget, as there are oftentimes single and double tank options to consider. The best water softener will last for years and require little to no maintenance other than filling up the salt (if your system needs it). Below, I’ve made a quick description about the types of water softening systems to give you a bit of a better idea what they do and how they do it. If you’re interested in possibly purchasing one of these systems for yourself, click on the image above to be redirected to one of the most trustworthy plumbing sites online, Plumber’s Stock.com.

            ION-EXCHANGE – This works by exchanging ions in the water sodium or potassium ions, removing ions that cause hard water. This prolongs the use of washing machines and dishwashers, but it is NOT recommended as drinking water due to its high sodium concentration.

            SALT-FREE – This is probably the most common water softening system you’ll see in American homes. It uses a filter so no chemicals, potassium, or salt is needed, and this means the minerals in the water aren’t affected either. This system works best for water that is moderately hard; for systems with excessively hard water, a salt-free unit may not be enough to adequately soften the water. These systems are sometimes known as descalers.

            REVERSE-OSMOSIS – This system uses pressure to remove impurities in the water via a semi-permeable membrane, much like our animal cells do. While this system can remove up to 98% of impurities found in the water, it also removes essential minerals simultaneously, so if you plan on using this system, it’s a good idea to get something that will replace some of the lost minerals and ions.

            MAGNETIC – This system uses magnets in or around the water pipes to remove impurities. Unfortunately, this type of system is only good if you plan on using the water for short periods of time, as the water will return to its hard water stage within 48 hours after leaving the magnetic field. 

Tankless Heaters: Gas vs. Propane vs. Electric

With the increasing rise in popularity with tankless water heaters, most homeowners are now asking the question, “Which fuel source is better?” Well, though it would be simple if it were all black and white, the real answer is that there is no single right answer. What’s best for your home won’t necessarily be the best option for your neighbor’s home, or your parent’s home.

When it comes to buying a tankless water heater, you’ve got three basic options: electric, natural gas, or propane. For the purpose of this guide, natural gas and propane will be combined into a single “gas” type, leaving us with Electric vs. Gas.

Image

Two tankless water heaters, side-to-side. Wanna buy one for yourself? Click on the image above!

Now, before we start, there are serious implications you must consider. For instance, it is important you consider the availability of each fuel source, the cost of installation of a particularly fueled tankless water heater, your personal water use habits (lifestyle) and needs, and the location of installation. Thinking about the before-mentioned criteria is important and will help you get on the right path to locating your fuel source for your new tankless water heater.

Now, we can progress to the more technical aspects. Let’s start with a generalized retail cost. Electric water heaters tend to cost significantly less than gas heaters; on average, an electric tankless water heater will cost anywhere from $500-700, while its gas counterpart can cost $1,000+.

If we move to efficiency and operating cost next, we’ll see that gas tankless water heaters pack a more powerful punch than their tanked counterparts (i.e. gas tank-style water heaters). As such, efficiency for these systems peaks at around 80-85%. However, if you’re looking for ultimate efficiency, electric systems are the way to go, peaking at an incredible 98% average. Electric tankless heaters are typically cheaper to purchase, more efficient when running, and have a cheaper overall installation cost. In addition, experts agree that electricity prices will remain relatively stable in the coming years while gas prices will fluctuate and possibly rise. Even so, keep in mind that gas is generally a cheaper alternative to electricity. To make the best decision for your home, you must factor in the fuel prices in your region and your hot water needs.

Now let’s move on to maintenance. In the grand scheme of things, electric systems require very little maintenance. Other than occasionally cleaning out the inlet screen, electric heaters don’t need to be maintained. Gas heaters, on the other hand, need to be inspected annually to ensure safe fuel combustion and top performance. Electric systems can also be troubleshoot-ed and repaired fairly easily in the event of a malfunction. Gas heaters tend to be trickier, running more complex heat exchangers and always imposing the danger of a gas leak.

Finally, we’ll end with installation. Gas tankless systems require complex arrangements of vents, especially when installed in a confined area. Typically, existing gas lines and vent ducts cannot be used. Price-wise, this makes for a very expensive installation. Electric tankless systems are typically only found in “point-of-use” systems, which are meant to power one or two hot water outlets MAX. Because of this, they are smaller (about a third of the size of a “whole-home” gas tankless system) and can fit into places like cabinets and closets near the outlets. This reduces the lag time (the time it takes for the hot water to reach your faucet) you would normally experience with the bigger systems. Unfortunately, electric tankless systems cannot usually power every single hot water outlet in your home. While a gas tankless system can usually sustain all the outlets with just one system, you would need 2-3 of the smaller, electrical systems to cover all your home’s outlets. This can make for a more expensive retail cost overall.

If you’re going tankless, the ideal place to start your search would be plumbersstock.com. We’ll end with a brief summary: Electric tankless systems are generally cheaper to buy, more efficient, require little maintenance, are easy to repair, and inexpensive to install. However, electric tankless systems are rarely made to cover more than 2 hot water outlets at a time, so depending on how many outlets your home has, you could be looking at buying up to 3 of these smaller units, the cost of which could get very pricey. Gas tankless systems, meaning natural gas or propane systems, are generally the more affordable fuel types and can power your entire home with the larger “whole-home” units. However, installation is expensive, maintenance requires an annual check-up by a professional, repairs are complex and should be handled by a professional, and they are ever so slightly less efficient than electric systems. What will you choose?

Advantages: Gas-burning Fireplace

            Winter brings forth cold nights meant to be spent sitting by a fire, drinking hot chocolate or cuddling with a loved one. If you have a wood fireplace, it may ruin the mood if you’re spending half an hour just trying to get it set up, then another half hour waiting for the air to be warm all throughout the room. Because of the nuisance wood fireplaces can present, natural gas fireplaces are often seen as the more conventional and efficient choice of the two and are often used by many homeowners who want the elegance of a fireplace without the hassle.

            Below, I’ve listed the top five reasons why it’s better to have a gas fireplace vs. a wood one. These advantages are a mixture of fact and opinion and should help you decide which type of fireplace is best for you and your lifestyle. If you’re interested in gathering some tools to get you started on creating your own unique fireplace experience, check out plumbersstock.com by clicking on the image of the gas fireplace below.

            And now, I present to you the top 5 advantages to having a gas fireplace over a wood one:

Image

  1. You have constant heat – Unlike owning a wood fireplace, which must constantly be fed to supply you with heat, a natural gas fireplace uses, well, natural gas in order to give you constant heat. Since the gas line is connected to the fireplace, it has a constant fuel source which you never need to replenish.
  2. No “dirty work” – With a wood fireplace, you have a lot of “dirty work” you need to complete in order to get the fire going, and even after the fire’s gone. You must acquire firewood, either by chopping and collecting it yourself or by purchasing it. If you choose to gather the wood yourself, you also need to let it dry before you can begin to try for a fire. Once you get the fire going, you need to watch out for sparks and ash flying out and constantly feed it to maintain that heat source. When you’re done, you must clean out all the ash, soot, and half-burned logs or risk smothering the next fire you set. With a gas fireplace, it’s much easier: all you need to do is flick a switch and KAZAM! Instant fire. Want the fire off? Flick that switch again. No messy cleanup, no time wasted.
  3. Easy to use – Not everyone has the skills necessary to light a fire. If you’re one of those unfortunate few who doesn’t know how to set a fire, you’d be better off bundling yourself up and trying to keep warm that way. Thankfully, you’ll have no such problems with a gas fireplace. It’s really as easy as turning on a switch, meaning anyone in your household can do it.
  4. Safety – Lighting a fire always presents some sort of risk. From sparks flying out and potentially setting your home on fire, to toxic carbon dioxide gas entering your home’s atmosphere, there’s always a risk when using your wood fireplace. If you switch to a gas fireplace, it’s much safer as there are no fumes or particles that are emitted or released into your home or the surrounding environment.
  5. Plenty of styles to choose from – Having a gas fireplace means having a wide variety of options to choose from. Whether you choose realistic looking ceramic logs or a beautiful grate, there’s plenty of choices out there to make your home look more sophisticated, cheerful, or modern. Additionally, you don’t need to worry about making a hole to install a chimney since the exhaust is ventilated outwards using a smaller ventilation system. 

Make your own BEAUTIFUL rug! A DIY Mini-Project

            Rugs are fantastic items to have around the house. They can be visual centerpieces as far as the colors involved, especially if laid out in a stark contrast room, such as a very light (white) room. Because of this, rugs can be pricey. A nicely decorated rug can cost you hundreds of dollars, depending on the size. What came to me over the holidays was this: Why not decorate it yourself?

            No, before you turn away, I’m not talking about bedazzling the carpet or anything. I’m talking flat-out stenciling a cool design onto it. How? Well, it’s actually pretty easy:

  • Buy a rug first. Any shape, any size. As long as it fits in the desired room, you’re good.
  • Now, buy a nice acrylic color. It may be something complementary or something totally wild. You can even buy multiple colors to create a rainbow effect. Buy colors that go well with your final vision.
  • Buy a stencil. There are hundreds of different stencils out there, from logos, to sports teams, to bands, to miscellaneous objects. If nothing strikes your fancy (say you want something that says “The Wilder Family,” for example), order a customized stencil. They’re usually not too expensive.
  • Buy some painting supplies, like a foam roller and a paint tray.

From here, it’s pretty straightforward. All you’ve got to do is center your stencil (or put it wherever it goes) on your rug, fill your trap with acrylic paint, and dip and roll on your foam paint roller. Make sure you don’t let it dry prematurely, as acrylic does tend to dry quickly, but also go light on the coat (acrylic also tends to get lumpy). It’s not a difficult task, and when you’re done, you’ll have a lovely masterpiece for a rug!

            Bring together the whole family and make it a fun, family DIY project! For more info. on how to make this sort of project a reality, click on the following URL: http://www.pinterest.com/pin/103653228896419266/

Insulation — It’s more than just for your walls

To insulate or not insulate? That is the question.

I know, I know, we’re not in high school drama class anymore, so I should just quit with the amateur theatrics, but I like to think of myself as a an expert forever bound to the chapel of the arts. . . Ha, that’s not true. I know as much about acting as I do about fixing motorcycles, which in layman’s term means, “not much.”

To get back on track, today we’ll be going over the topic of insulated ducts. “What ducts,” you may be asking. Well, look above you. What can you see? If you’re in a normal part of your home, you’ll probably just see the celling, but if you’re in a basement or an uncompleted room, you may see an intricate layer of ductwork and pipes connecting gas lines, water lines, and air ducts. This is what I mean by ductwork.

Insulated duct!

A typical lined duct.

            If you take a look at them, you may notice that they’re just galvanized steel ducts which help in the transfer and circulation of air throughout your home. However, like many fragile HVAC components, ductwork should be insulated, especially if there is an obvious difference in the air surrounding the duct and the air traveling within it.

Insulation is applied to help enhance thermal performance and prevent condensation and dripping, which if left unattended could turn to mold. Without proper insulation, the air will need extra heating or cooling just to retain its desired temperature. Another negative effect is that since the air requires extra heat and cold to keep its temperature, you’re throwing away unnecessary money on high energy bills.

Along with the benefits of having insulated ducts in your home, there are always some cons to purchasing this sort of thing spontaneously. Insulated ducts tend to cost much more than uninsulated ducts and installation can be messy. So, if you add in the cost of purchase and then the cost of labor, you’ll be spending a few hundred extra dollars to protect your home.

If you haven’t already thought of it, take a peek inside your ducts. A clean duct should have no stale or stagnant water smell, no musty air smell, no large pockets of collected dust, and no visible mold growth. When you’re looking into your ductwork, however, don’t simply notice if it’s clean—notice if it’s INSULATED. The kind of insulated ducts I’ve been talking about for the past few paragraphs are the kind that have a layer of insulation on the INSIDE. If your ducts aren’t insulated, take a look at purchasing some exterior insulation, which is vastly cheaper and often comes in bulk.

  • Duct insulation sleeves – Come in pre-measured lengths. Simply snip to size and fit over your duct. Generally made of foam, bubblewrap, and fiberglass.
  • Foil-backed self-adhesive foam – Wraps around duct like a blanket. Best when combined with other, thicker insulation pads to reduce noise and increase insulation rating. Not made with fiberglass!
  • Fiberglass and cotton duct insulation – Generally comes with an aluminum foil backing to repel moisture invasion or air leaks. Comes in various thicknesses and are often the cheapest of the insulation pads. Simply cut to size and wrap around.
  • Foil-backed bubblewrap – Come in a variety of brands. Pick the more expensive ones to ensure satisfactory insulation power and vapor barrier performance. Unfortunately, you have to do a few extra steps before you install this type of insulation—it’s a hassle and should be careful considered before purchasing.

If you’re interested in protecting your home by purchasing insulation, make sure you stop by plumbersstock to check out the great deals! Click the image above to be redirected to my favorite plumbing and home improvement store!

Troubleshooting your AC

Summertime is filled with pool parties, vacation time, and good ol’ heat.  With that sort of environment greeting you every morning, what’s not to love? Oh. . . maybe the heat? If your AC is busted or not working properly, waking up every morning bright and early can be disastrous, especially if you feel like you’re melting from the heat wave. That’s a problem. To ensure this doesn’t happen to you (or if it happened last summer, to ensure it doesn’t happen again), fix up your AC.

I know what it sounds like, that’s probably easier said than done, right? Actually, troubleshooting your AC unit is easier than you think. Today, I’ve made a short list of things to look for when attempting to repair your AC. Simply identify the problem that sounds the most like yours, read the possible causes, and take a crack at the possible solutions. While one solution may not work for you, another one might. Don’t discourage and only call a professional if the solution says so or you feel you absolutely cannot get it done.

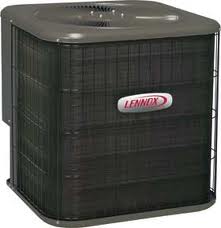
A basic outdoor AC unit

            PROBLEM ONE: My AC doesn’t cool.

Possible causes: This may sound cruel, but make sure you have an AC system installed BEFORE you try to fix it. Not all houses have an AC system. For instance, one of my friend’s homes by the university has central heating, but not central cooling. Make sure your thermostat has a “cool” option and you can plainly see an AC unit outside before you attempt to fix a problem that may not exist.

With that out of the way, if your AC unit isn’t cooling, it may be due to a handful of different causes, namely:

  • The thermostat is set too high
  • The condenser is dirty
  • The condenser is blocked
  • The evaporator is dirty
  • The compressor is faulty or there’s not enough refrigerant in the system.

Possible solutions?

  • Lower your thermostat’s setting
  • Clean the condenser coils and fins
  • If the condenser is blocked, trim back any shrubbery and plants to give at least 2 feet of space to the outdoor unit.
  • Clean the evaporator if it’s dirty.
  • The last two were grouped together because both of these problems require the aid of a professional.

PROBLEM TWO: The cooling is uneven.

Possible causes: If the cooling is uneven, it’s most likely due to the face that the distribution system is out of balance.

Possible solutions? This one is pretty simple. Balance your system.

PROBLEM THREE: The cooling is inadequate.

Possible causes:

  • The thermostat may be set too high
  • The evaporator may be dirty
  • The unit may be too small for your home size

Possible solutions?

  • Try lowering your thermostat’s temperature
  • Clean the evaporator
  • Replace this with a larger unit. If the unit is too small, it’s sorta a big deal. You risk the chance of overheating the unit by working it too hard when it won’t be able to fully cool down your home. This can cause damage to the system internally and may turn into a hazard if it’s done often enough. Replacing your system with a larger unit can help. To figure out which unit is the right size, click here.

For the most part, those are the top three problems and solutions when it comes to your AC system. If you’re looking for some tools to help you get on the right path of fixing your AC, check out the trustworthy plumbersstock.com by clicking on the image above.

Air Humidifiers – The Real Deal

            Christmas is the season of giving, but sometimes, we get more than we bargained for. While presents all around are the epitome of a merry and wonderful holiday, you may find yourself getting dry, itchy skin, a scratchy throat, static electricity buildup, a wheezing cough, and sinus headaches as well as that fantastic new camcorder you wanted.

            If the holiday season brings about any of the above physical symptoms, that’s a red flag letting you know your home is lacking moisture. Low humidity can cause discomfort, especially in those regions where it’s already dry, like Colorado or Utah. Dry air can aggravate severe respiratory problems, dry out nasal passages, and even lower your immune system to make you more susceptible to illnesses such as a cold or flu. Humidifying your home using a whole-home humidifying system will help rid these problems and make your home a more comfortable place to live in.

            You have low humidity, but how did that happen? Well, low humidity can be caused by a number of things, but the number one reason is central heating. If your home relies on a forced air heating system, that hot air is sucking moisture out of the air with no way of replacing it. You may not notice it right away, but your home does: hardwood floors tend to shrink and constrict when in a dry environment, house plants tend to droop and wilt, and even wallpaper will start to peel.

            The solution is investing in a whole-home humidifying unit. These work alongside your current heating and cooling systems to replace lost moisture in the air. Similar to how heating and cooling systems have thermostats which tell you the temperature, humidifying system have humidistats, which tell you your home’s humidity level. Ideally, you want to be operating at a humidity level of 35 to 40%.

            Here’s how it works: air heated by your furnace is pumped through a pad in the humidifier called the evaporator pad. This pad is drenched in water. As the air passes through it, it absorbs moisture. When the air is released throughout your home, it also releases that moisture. You’ll see yourself using anywhere from 8-20 gallons of water a day to keep your home at the right moisture level. It may seem high, but in general this amount of water isn’t enough to steeply raise your water bill.

            You may notice that this is specific only to forced air heating systems. The reason for this is that the alternative heating method, boilers, heat your home using water. As we all know, as water heats it evaporates, so boilers naturally replenish the moisture in the air.

            Buying a humidifier is a big decision, and it comes down to knowing what brands are the  best and what your budget is. Personally, I favor Honeywell for these services. They carry a variety of different models which all work to efficiently replace the moisture levels in the air. A few of their best brands are their TrueSTEAM and TrueEASE models.

            If you’re looking for a trustworthy and affordable place to start your search, make sure you visit plumbersstock.com by clicking on the following URL: https://www.plumbersstock.com/category/553/air-humidifiers/.